RDS Role
Description:
Follow this guide to install a RDP server in Server 2008. Note that the options listed here are going to be customer specific, many networks are going to be different from this. Another key note to remember is that “Terminal Servers” and “RDP” servers are the same thing. Microsoft is moving everything towards RDP servers in the near future so we may not be hearing “Terminal Server” much longer.
To Resolve:
-
First answer key questions: Will they benefit? Is it practical? Who will support it? It’s beneficial because of centralized application install and management, multiple locations that need access to a single database, and max security => Web access and email can be restricted. NOTE: It is not recommended to install this role on a Database server or a Domain Controller if possible. In the ideal situation, an enterprise setup will have three different servers: A Domain Controller, a RDP Server, and a Database file server.
-
Run =>
control=> Server Manager => Add Roles => Next => Check Remote Desktop Services => Next => Next -
If the server is also going to be licensing server for Terminal Server then check the following. If not then check Remote Desktop Session Host.
-
Next => for Authentication Method, choose “Do Not Require” => License Mode will be “per user” => Next => for “Allow user to Access” click Next as we will add users later => for Configure Client Experience click Next and take the default => for Discover Scope for the license Server click next => Click Install => Click close and reboot the server.
-
After reboot: Start => Administrative tools => Remote Desktop Services => Remote Desk Licensing Manager.
-
Right Click on the Server name and click “Activate”.
-
Configure Session Connections. On this selection, set it to “Automatic” and fill in the info. Once it completes, it asks you to add the license through the License Server, enter it as it appears on the statement.
-
Start => Administrative tools => Remote Desktop Services -Remote Desktop Session Host Configuration.
-
Click on “RDP-tcp” in the middle of the screen. Go to the General tab. Under Security Layer- you can change this to RDP instead of Negotiate for less security. On the Client tab, disable a lot of the choices, leave “clipboard and audio/video” but others need to be disabled by checking the boxes. Many of these are user specific so get the information from the customer for what they are wanting setup.
-
Click on the sessions tab and configure the following way. When done click apply and OK.

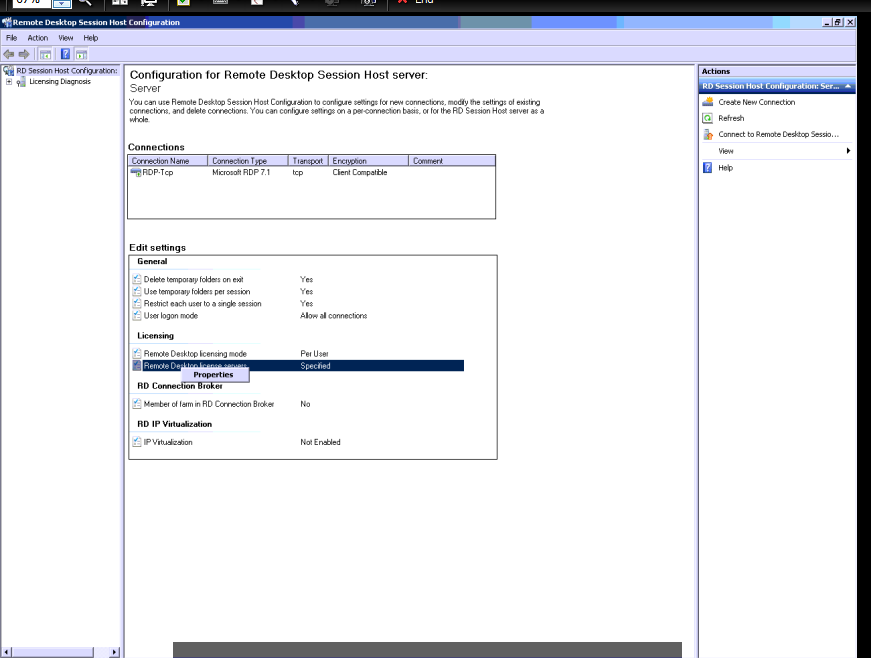
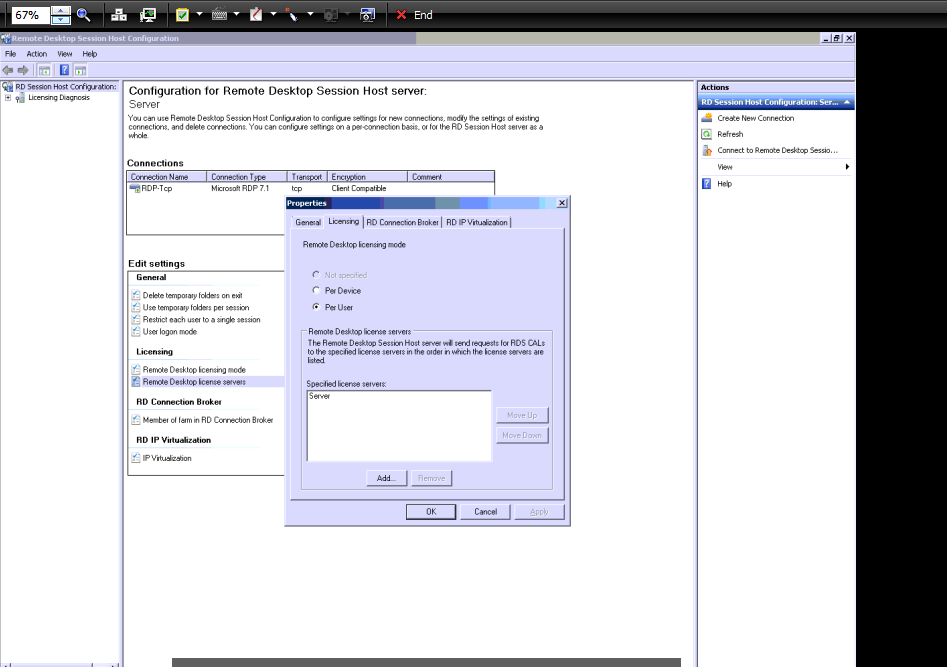
- Click on Remote Desktop License Server if this is the licensing server. You may see something about a “Connection Broker” on the list, don’t do anything specific with it but note that this can be used in “Load => Balancing” server farm situations. An important note on RDP servers is that once they are enabled, by default the server will allow up to 3 concurrent sessions, 1 local and two remote sessions. If the “Restrict each user to a single session” checkbox in the Remote Desktop Session Host Configuration is checked, it will create a temp profile for a current logged in console user if they are using the same account remotely.
- Add the server to the list. All Done!
-
Now that you created a RDP Server (or Terminal Server) install all printers for all users.
-
Add “Remote Users” group to the users you want to have RDP access to the server under “Active Directory Users and Computers” if on a domain (
compmgmt.msc=> Users and Computers if they are on a workgroup).
Comments