Setting Up RDP For Home
Description:
Follow these steps to remote into a specific computer on your home network from anywhere in the world using RDP => Remote Desktop Protocol. Note: This is not the most secure way of doing things, anyone can remote into your computer if they know your account username and password to any account on your machine. Nowadays there are programs that will attempt logins using brute force until they get the right one, a VPN or Remote Access software such as LogMeIn or PCAnywhere is a safer method.
To Resolve:
-
If you have not already, make sure that your modem is in a bridged mode of some sort. Follow the steps in “Bridging A Modem”
-
Login to your router’s GUI. If you don’t know it, run an Ipconfig (cmd =>
ipconfig) and enter the “Default Gateway” IP address that you see into a browser, you should be able to access the GUI. Login, if you don’t know it => reset your router to defaults and Google search your routers model to find your default login, usually “admin/admin” or “admin/password”. -
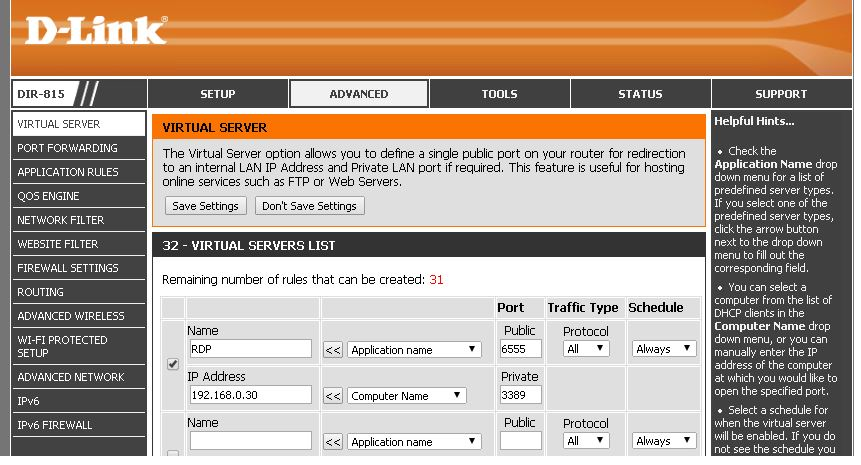
Find a tab called “Virtual Server”, “Port Forwarding”, or “Applications and Gaming” and it will have a blank list of rules you can create.
-
Next you will create a new rule to open a public port of your choosing and forward to whichever computer you want to control remotely. Note the private port needs to be 3389 which is the default Remote Desktop services port.
-
After you hit save, it’s time to test the connection. Go to “ipchicken.com” and get your public IP, you can also get this from inside the router’s page, but Ipchicken is more simple.
-
Last thing to do is to configure whichever computer you are forwarding the port to for Remote Access. To do this, you right click on the My Computer icon or Run =>
sysdm.cpl=> go to the remote tab and select the radio button that “Allow connections from computers running any version of Remote Desktop” (In the case above, 192.168.0.30). It would be a good idea to set a static IP on that computer as well. -
So, from another computer on the network: Run =>
mstsc=> (EnterPublicIPAddress:6555) and it should bring up a screen asking for credentials to that computer, enter them and you have a RDP Session from the outside! -
Now, as yet another step, you should setup a dynamic DNS. Dynamic DNS is a service provided by third-party providers in which a clients’ constantly changing IP address is kept track of and DNS servers are updated with the new IP address automatically. If you have a broadband Internet connection, you more than likely have a dynamic IP address.
-
Create an account with DynDNS (I use no-ip.com) and then login with your username and password once you receive the authentication email. On the Account Services page, click on Add Host Services and then Add Dynamic DNS Host. Pick a domain name and then come up with a sub-domain, so you have a unique domain name like jimmy.dydns.com or billy.is-a-geek.com. You will use this hostname to access your server or home computer. Leave the IP address field blank.
-
Download the DynDNS client tool onto your computer or server. This piece of software is what will automatically check to see if your computer has a new IP address and if so, will notify the DNS servers of the new IP address. Always keep it running in the background and you’ll always be able to access your computer.
-
So for remote access, you just get on any computer: Run =>
mstsc=> “HostNameYouCreated:6555” ex:hostname.no-ip.info:6555and you don’t ever have to remember your IP address again. -
As an added step, you should go into your modems GUI (make sure you have the DAC- Device Access Code handy) and login to the modem. Then go to “Firewall” settings and DMZ and add the router to the DMZ list. ATT for instance will have 2 options for this, step 1 you select your router (which would be dlink router in this case) and step 2 is to “Allow all applications through..” as shown below.
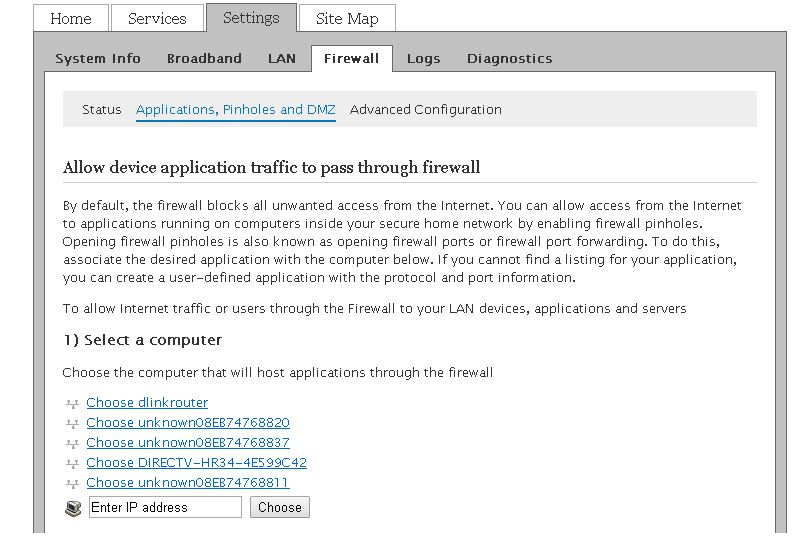
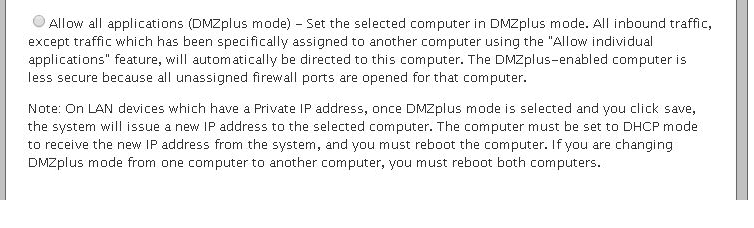
- THIS MAY PRESENT A SECURITY RISK TO YOUR NETWORK SO USE AT YOUR OWN RISK!!
Comments