Setup LVM On Linux Install
Description:
Setup LVM with LUKS Multi-Disk. For this lab I used 2 127 GB vhd’s using Hyper-V and Fedora 25 Gnome.
To Resolve:
-
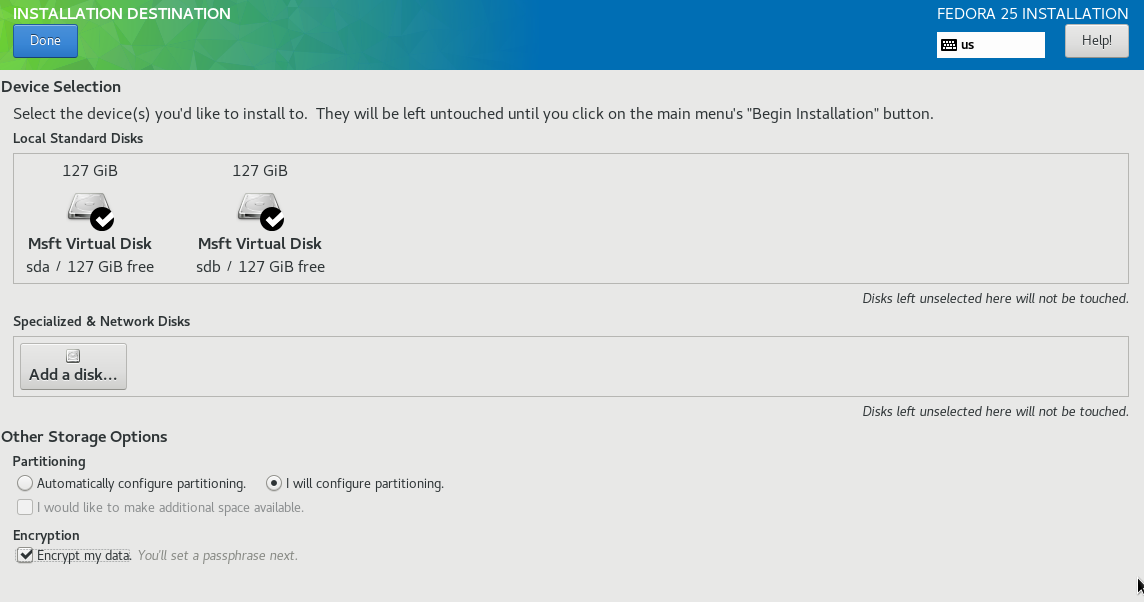
Launch installer via Live USB image
-
Select all your disks and choose the option to “encrypt my data” as well as “I will configure partitioning”.
-
Click “done” and then enter the passphrase for your setup.
-
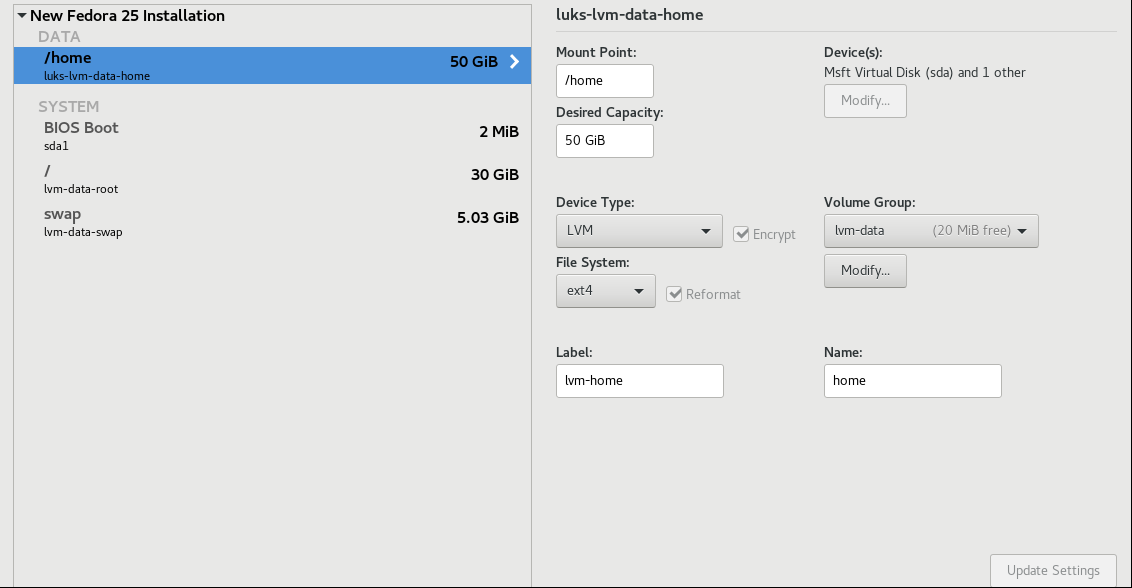
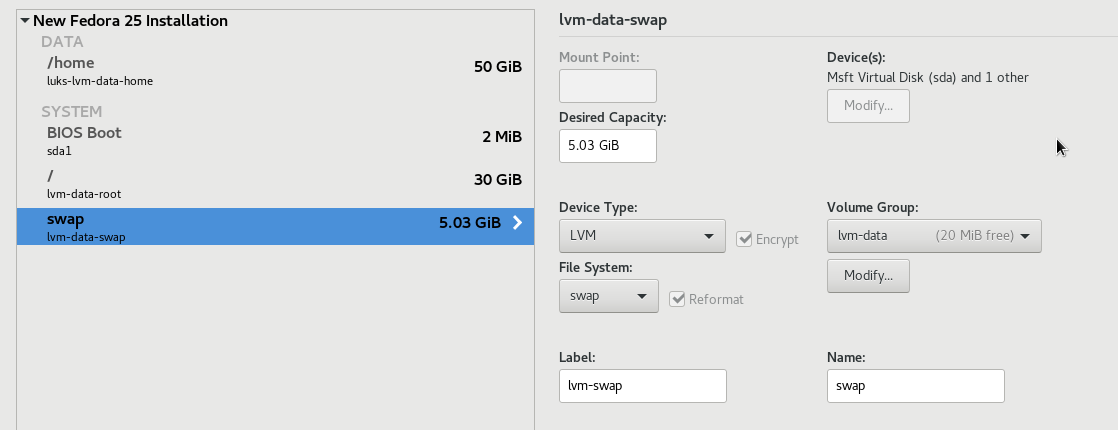
Now on the next screen, we configure our disks:
-
Rules
- boot partition = /boot needs to be at least 250MB.
- swap needs to be 1024 MB+ (for a 4GB VM). For best results, follow:
Amount of RAM in the System Recommended Amount of Swap Space 4GB of RAM or less a minimum of 2GB of swap space 4GB to 16GB of RAM a minimum of 4GB of swap space 16GB to 64GB of RAM a minimum of 8GB of swap space 64GB to 256GB of RAM a minimum of 16GB of swap space 256GB to 512GB of RAM a minimum of 32GB of swap space - Paths reference:
/home= lvm ext4/boot/EFI standard EFI system partition 260mb/ext4 volumb group/swap
-
-
Now we just create them - Create boot:
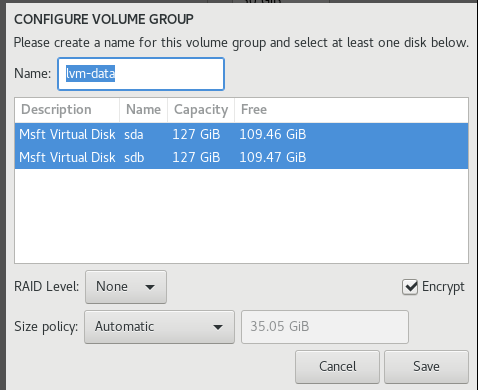
- Create vg
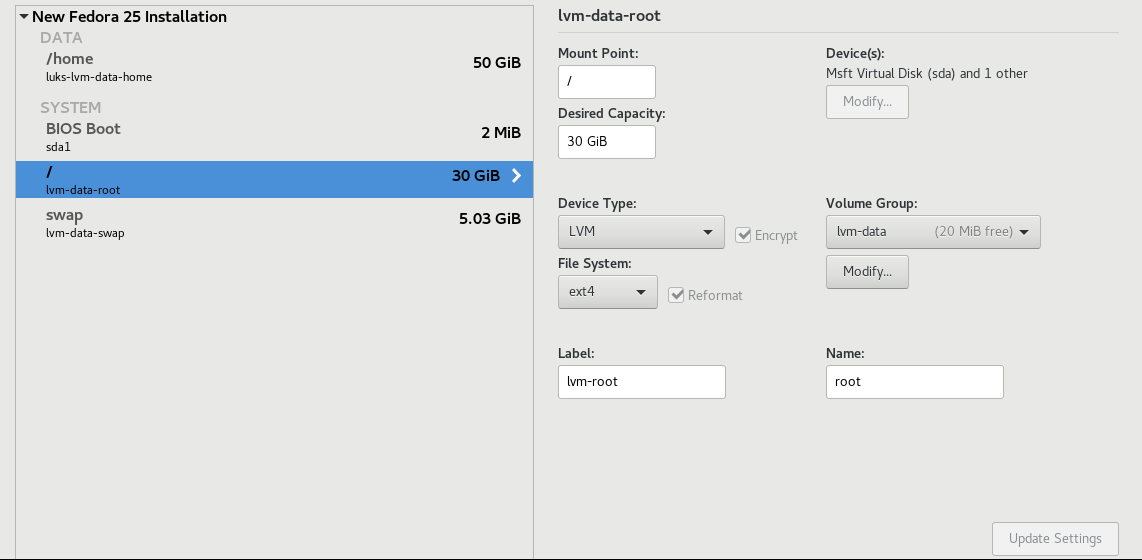
- Create root
- Create swap
- Create home
-
-
And then we are done! Finish the installer.
-

Command Line Method:
Here is how to do it from command line although I haven’t actually done this. Steps to complete = Create physical volume, then volume groups, then logical volumes.
-
First we want to see our current disk setup:
1
2
3
4
5
# Identify free disks
lsblk
pydf
blkid
fdisk -l
-
Now we create a logical volume. Note that the disk should be blank.
1
2
3
4
5
6
7
8
9
10
11
fdisk /dev/sdb

n - new part
p - primary part
1 - first part on disk
t - change type
8e - lvm
p - preview
w - write changes

# Do same thing for each disk
-
Now we create the disk:
1 2
pvcreate /dev/sdb1 #could also do pvcreate /dev/sdb1, /dev/sdb2 … -
Now create the Volume Group
1
2
3
4
5
6
7
vgcreate vgpool /dev/sdb1

# Could also do pvcreate /dev/sdb1, /dev/sdb2 …

lvcreate -L 3G -n lvstuff vgpool

# -L is size, -n is name, and vgpool is mentioned so that lvcreate knows where to get the space from
-
Create a filesystem
1
mkfs -t ext3 /dev/vgpool/lvstuff - creates a file system -
Mount it
1
2
3
4
5
6
7
8
9
10
11
12
13
14
15
16
17
mkdir /mnt/stuff

mount -t ext3 /dev/vgpool/lvstuff /mnt/stuff

# Adding a new hard drive:

vgextend vgpool /dev/sdc1

# Tell it how much to extend by, should be 3+8 but really extends to 8.
lvextend -L +8G /dev/vgpool/lvstuff

# Actually expands to 11 GB instead of 8.
# lvextend -L+3G /dev/vgpool/lvstuff

# Now we extend our filesystem:

resize2fs /dev/vgpool/lvstuff
Comments