FreeNAS Install
Description:
FreeNAS is an open source software that allows you to create sharable volumes based off the Free BSD operating system (derived from Unix). This software is similar to that of Vphere where you install this on a machine and then use a browser to control it remotely. Follow these steps to install FreeNAS:
NOTE: I don’t have any actual hardware devices to install this to so I am using VMWare Workstation 10 to create a VM.
To Resolve:
-
Get the .iso from their main website and create a VM for it with bridged networking (it will receive an IP on my LAN). Give it 8 GB memory and two drives at least.
-
Boot up the VM and install just like any other OS installation, it installs on FreeBSD so it will use *nix commands.
- If you see a screen with a lot of dots and plus signs, that is okay. I guess that means its setting things up.
-
Once its created, it will ask to remove the disk and reboot. Do that and you get to a 14 option menu with an IP address where you can see the GUI. Go to it.
-
In the installation wizard follow the prompts until you get to the storage type and make sure to select iSCSI.
- You sign in with username: root and the password you created during setup.
-
First thing you want to do is go to the Network tab and verify all is correct as far as DHCP, Default Gateway, and Subnet settings.
-
Once logged in, navigate to the Directory tab and make sure you are connected to Active Directory under the NT4 subsection.
-
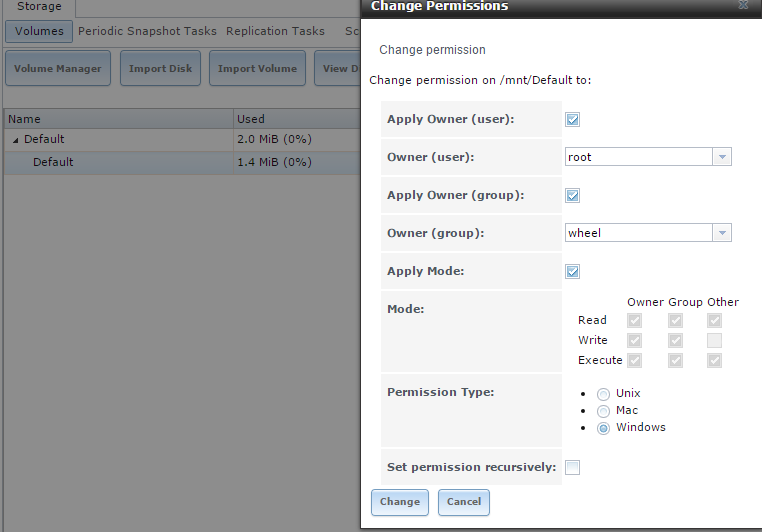
Go to Storage => Volumes and make sure you change the permissions for the volume to Windows.
-
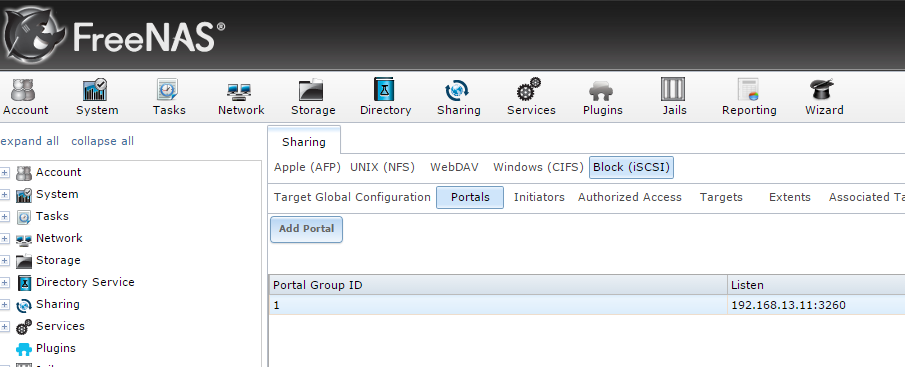
Go to: Sharing => Block (isSCSI) => Portals (subtab). Select “add portal” and then select the IP address it gives you or select one from the drop down.
-
Now go to the Initiators tab and “add initiators”. These are the clients that will connect, select the default “ALL” in here or specific hostnames/IP’s.
-
On the Authorized Access tab, fill out the username as the domain admin user name and set a passcode that is between 12-16 characters long.
-
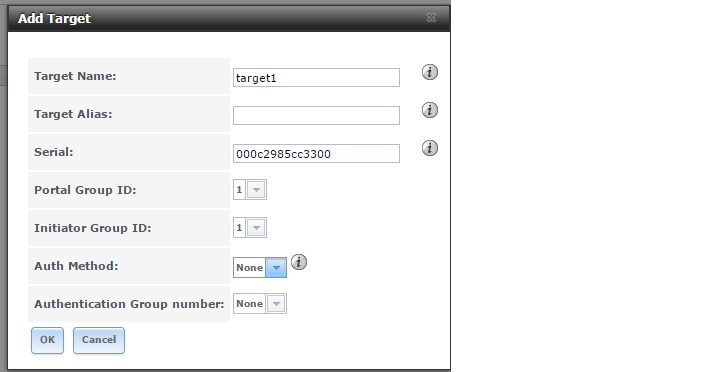
On the Add Target tab, create a target name and associate it with the appropriate portal.
- On the extents tab, make up a name for an extent, select to browse to your volume from the previous step and append the name on the end of it, then create a size in bytes (Mine is roughly 40 GB in the example). It is recommended to choose “File” extents over device extents from what I have read on the intertubes.

-
On the Associated Targets tab, select the target name you created and the extent name in the drop downs, click OK.
-
Now scroll down to services and enable the iSCSI service.
On the Domain Controller:
-
Open up Server Manager and go to iSCSI Initiator.
-
Hit refresh and select the disk. Then go to the auto-configure tab for Windows to autoconfigure your share.
-
Run =>
diskmgmt.msc=> initiate the disk and create a volume.- If the disk is Offline with the message
the disk is offline because of policy set by an administrator, read this article
- If the disk is Offline with the message
-
Once you create a volume, your done. As an extra precaution, I went to the security tab and gave my domain admin full control on the drive in Explorer. Now you can start setting up high availability if you wish.
References:
“10. Sharing”
“How To Configure and Install FreeNAS for iSCSI Target”
“Configure iSCSI target on FreeNAS 8.3 & access same target from Windows 2012 Server”
Comments